Is Mold Lurking Under Your Laminate Floor? Smart Prevention Tips
Have you ever suspected that you have mold under laminate flooring? If you see black spots on your flooring or begin to exhibit symptoms like sneezing or coughing, your house is under attack.
Despite that, you don’t have to be afraid of mold. Knowledge is power, and today, I will show you everything you need to know about mold under your flooring, from causes, treatment, to prevention. Without further ado, let’s start with some basic facts about laminate flooring!

Laminate Flooring And What Makes It Susceptible To Mold
Years ago, I was in a dilemma about whether to go with laminate or hardwood flooring. After hours of proper thoughts, plus some pieces of advice from my friends, I have made up my mind. It was laminate flooring that made the cut, and I couldn’t be happier with the decision.
Smooth, glossy, and sometimes feeling just like wood, laminate flooring has easily become one of the most favorable flooring options of the century. Besides its cheap installation expenses, you will love that it can hold up to standard daily use well.
Nonetheless, the reason I chose laminate flooring is its ability to resist water, which cannot be found in its counterpart (since wood is porous). Despite that, without prompt measures, your laminate flooring can still fall victim to moisture, or its by-product, mold.

Common Causes Of Mold Under Your Laminate Flooring
Mold grows and proliferates where moisture content is high, such as in the bathroom. Or, when you happen to knock over your cup of morning tea and forget to clean up the mess, mold will come into existence within 12-36 hours afterward.
This also depends on many factors, such as how long the water has been on your floors and the sanitary conditions of the water source. For instance, if your flooring fell victim to sewage waters, which contain fungi and bacteria, it would only take mold less than a day to grow.
Signs That Mold Has Grown Under Your Laminate Flooring
How can you tell whether mold is lurking under your footsteps, waiting for the perfect time to take your life? As much as I want to trust your instincts, the following indicators are far more reliable, and they should be accurate in most cases.

- Musty odor: If your nose gets a whiff of something musty, the chances are that there is a huge mold colony hiding from your eyesight. Such odors are indeed not pleasant, but gladly, you can disperse mold smell with a host of household resources.
- Excessive moisture: As explained, moisture is the cause of mold. Thus, wherever it is present, particularly in large quantities, you can be assured that mold will stop by in no time.
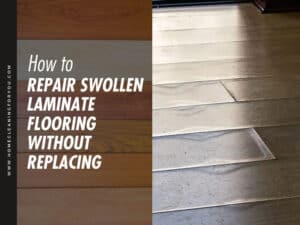
- Material distortion: As mold thrives, it will discharge gases known as mVOCs (short for microbial volatile organic compounds). Joining forces with air that was previously moisture, these gasses will result in deformations like swelling, bubbling, or buckling.
- Mold detector: Another way to test for mold is to use a mold detector kit, which can be up for grabs at many home improvement or retail stores. For further examination, you can send the test sample to the lab.
This test kit will show you whether mold is growing beneath your flooring
The Ultimate Treatment To Mold Under Laminate Flooring
To deal with mold under your flooring, your only choice is to lift it up and inspect the damage carefully. When the damage is not too severe, such as derived from minor spillage, you can disinfect the plank and put it back in place.
Unfortunately, if your laminate flooring was damaged by sewage or floodwaters, the issue is often unsalvageable. Well, there’s only one way to find out if you can save your flooring: get down to work ASAP!
Tools And Supplies
- Borax
- Water
- Fan or dehumidifier
- Hanging plastics
- Adhesive tape or pins
- Pry bar or utility knife
- Brush
- Scraper
- Vacuum with HEPA filter
- N95 facemask
- P100/N100 respirator
- Rubber gloves
- Tyvek suit
- New laminate planks (optional)
Instructions
Before taking your flooring up, some preparations are required to facilitate your cleaning job.
Step 1: To start with, it’s essential to don protective gear to minimize contact with mold. Your best bet is to wear a face mask, a respirator, and a pair of gloves. To reduce mold contact to the bare minimum, you are well-advised to put on a Tyvek suit.
Step 2: Check whether your flooring is still wet. If it is, dry it out using a fan or a dehumidifier running at the highest setting. A ceiling fan can reduce the waiting time dramatically as it can maximize air circulation.

Step 3: Inspect how much damage mold has caused to the room. For example, glimpse over your wooden bookshelf and see if mold is present. If not, move it to another room. With other pieces that have been contaminated, unfortunately, you will have to dispose of them – there’s no perfect cure.
Step 4: The last step in the preparation is to seal the molded zone using hanging plastics. To secure the pieces, you can use pins or sticky tape. You will want to keep a window open as it is not safe to work with mold in an unventilated area.
Step 5: Now, you are ready to kick-start your removal project!
The first step is to pry off the trims, which secure the edges of your flooring. Your tool for this job is a pry bar, but a small utility knife should work just fine. Glide your tool through the paint until the trims are separated from the wall.
Note: If you have quarter-round moldings, remove them as well.

Step 6: Once the baseboard trims and moldings are removed, grab a pry bar and pull up the first row, starting from the tongue side. A little wiggle motion will make it easier for you to get it out. Continue with other rows until the entire flooring is lifted.
Note: Should only a section of your flooring be affected, you just need to rip up the damaged planks, plus one or two adjacent ones, to check whether mold has spread. If mold has gotten to the subfloor, scrape it away.
Step 7: Dispose of the planks that you think are unsalvageable. After that, disinfect the other laminate planks with a spray bottle filled with a cup of borax and a gallon of water. For larger areas, splash the solution on the area, then use a brush to wipe out the moldy parts.
Note: For the best result, leave the solution on for about 15 minutes to saturate the mold. To achieve a better outcome, swap plain water with cleaning vinegar. Regarding planks covered in huge mold clusters, loosen them beforehand with a solution made of dish soap and water.

Step 8: Going forward, you will reinstall the planks after they and the subfloor have properly dried out. Make sure that the subfloor is flat and clean. As for the new planks, don’t forget to let them acclimate for at least 48 hours prior to installation. Return the trims and moldings to their places.
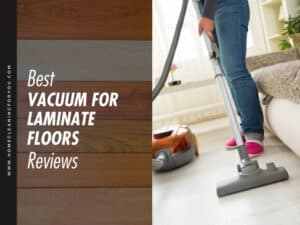
Step 9: As you have finished installing your flooring, run a vacuum with HEPA filter to get rid of dormant spores. Treat the new flooring with the borax solution again, then allow the fan or the humidifier to run for a while to dry out the moisture. The job is done!
Remove your laminate flooring like a boss with these clear instructions
The Tips You Need To Guarantee Success For This Job
Cleaning mold is a nitty-gritty work that’s not only dangerous but also strenuous. If you agree with this idea, perhaps you will want to have a look at the tips below – for 100% success!
For the mold removal part:
- Take prompt actions: You may wonder whether mold under flooring is dangerous or not. In general, it is not too dangerous. Yet, prolonged exposure to it will lead to many critical health conditions, so don’t hesitate to leap into action when you suspect that mold is present.
- Wear protective gear: Although I have specified this in the instructions, it’s important to have protective gear and clothing on all the time. In truth, mold itself is not a threat; it is the substances called mycotoxins that compromise your immune system. (1)
- Discard damaged planks carefully: Don’t just toss the planks straight into the trash can! To prevent mold spores from escaping, put the damaged planks into a trash bag and seal them carefully.
- Seek other alternatives: If you have no borax at hand, vinegar is another choice you can go with, thanks to its high acidity. While bleach is not highly recommended, it can still be utilized for disinfecting your flooring after massive flooding.
Note: Do not attempt to mix bleach with other chemical products, such as ammonia, or lethal accidents like unconsciousness or death will happen. (2)
For the laminate flooring replacement part:
- (No need to) be gentle: If you plan to discard your old flooring, there’s no need to be extra careful – damage is forgiven. On the other hand, extreme caution must be taken if you intend to reuse the planks (to illustrate, the locking mechanisms are fragile and can be broken easily).
- Reuse the planks if possible: If only a section of a plank is damaged, cut it out with a jigsaw and keep the intact part for reinstallation. Also, you can use a 100-lb roller to repair your swollen laminate planks without replacing.
- Contact a professional: Lastly, don’t hesitate to call in an expert if you are uncertain about putting things back in place. Improper installation can result in a great number of problems, and some are irrevocable even with professional intervention.

You can see this video to know more:
Deceptively Simple Ways To Prevent Mold From Recurring
Do you wish that mold is out of your life for good? Well then, you cannot afford to ignore the following tips. Check them out!
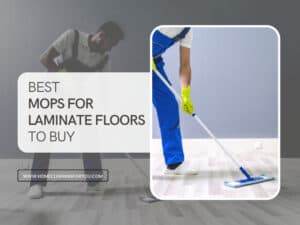
- Keep the floors dry: Clean up the spills as soon as you spot them. The longer they sit, the more likely they will penetrate the surface. Furthermore, avoid wet mopping daily since laminate cannot withstand water well.
- Buy area rugs/rubber mats: As for moisture-prone areas, such as the bathroom, it is a great idea to purchase an area rug or a rubber mat to reduce splashes, plus the risk of slipping.

- Maximize air circulation: A stuffy, overcrowded space is a perfect breeding ground for mold. To keep the space ventilated, open the windows more frequently. Declutter items on the floor to avoid air congestion, if possible.
- Install moisture/vapor barrier: As per the name, it is a sheet of plastic that prevents moisture from reaching your flooring. The moisture barrier can also control pests and regulate temperature to keep your feet warm during wintry days.
- Invest in waterproof laminate flooring: Attention, there’s a long-term solution made just for you! If spillage often occurs around your home, waterproof laminate flooring is just the thing you need. It is not too pricey compared to its regular counterpart.
Avert risks of moisture under your flooring with this ultimate barrier.
FAQs
Cleaning mold under flooring can be somewhat daunting and at times leave you with further questions. If so, stop by this section for every answer you need!
Be The Hero Your Laminate Flooring Needs
With my detailed instructions, I hope that mold under laminate flooring is now gone for good. Not only the curb appeal of your precious flooring is finally restored, but your health will also no longer in serious danger.
Did you find my post helpful? I’m confident that you did. Should you succeed in dealing with mold under your flooring, share your experiences with other readers and me, along with tips or questions that you may have via the comment section. I’m looking forward to them!

References
- Mycotoxins. (2021) www.who.int.
- Helmenstine, A. (2021) sciencenotes.org. Mixing Bleach and Ammonia – Here’s What Happens.
Samantha Lee
Head Cleaning Expert
Expertise
Professional Home Cleaning, Green Cleaning Techniques, Stain Removal & Fabric Care, DIY Home Maintenance & Organization, Sustainable Cleaning Products, Home Care for Busy Lifestyles
Education
University of Denver
Samantha Lee is the Head Cleaning Expert at HomeCleaningForYou.com, specializing in eco-friendly home care. She holds a Bachelor of Science in Environmental Science from the University of Denver, focusing on sustainable cleaning solutions.
With expertise in green cleaning, stain removal, and DIY home maintenance, she helps homeowners keep their spaces fresh and chemical-free. Samantha has been featured in lifestyle publications and has partnered with brands promoting natural cleaning products.
She also shares practical tips through her blog, online courses, and workshops. Passionate about sustainability, she enjoys testing new eco-friendly cleaning methods and spending time outdoors.