Best Guide to Make Your Vinyl Floors Shine Like New
How do you make vinyl floors shiny? To some people, maintaining the shine of vinyl floors is a daunting task. No matter what they do, the surface will lose its luster over time due to high foot traffic, dirt, stains, and God knows what else.
If you are one of those, don’t be embarrassed that I just called you out. This post is here and will take your cleaning game up a notch, ensuring that your flooring is always squeaky clean. Rest assured that your guests will go wow at the very next visit!
Without further ado, let’s roll up your sleeves and get down to cleaning!

About Your Vinyl Floors And Why They Need Some TLC
Vinyl flooring, short for polyvinyl chloride or PVC, is one of the most popular resilient flooring choices, and the hype surrounding it is not too difficult to understand.
Besides vinyl flooring’s reasonable installation cost, people are obsessed with it owing to the easy application and maintenance. It also boasts great durability, holding up surprisingly well even when facing dirt, stains, and heavy foot traffic.
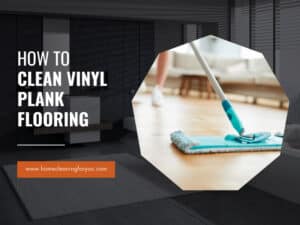
Types Of Vinyl Flooring
Vinyl flooring is available in five main types as listed below.
- Plank: Vinyl planks are engineered to mimic the realistic looks of wood but only for a pretty penny. They are scratch and water-resistant, so you don’t have to spend much time and effort on the upkeep.
- Tile: Cost-effective, durable, and available in plenty of designs, vinyl tiles are ranked only after their plank counterparts. Instead of long strips, they are cut into squares in diverse sizes and can be installed and removed without needing professional help.
Note: Vinyl planks and tiles are often referred to as luxury vinyl tiles (LVT) because, after all, they share the same features. The only differences they have are the size and the prints (vinyl tiles come in a wider selection of prints).
- Sheet: Sheet vinyl flooring comes in large and flexible rolls. It is often installed where moisture is often high, such as in the kitchen or the bathroom, as it is impermeable. The only limitation it has is the difficulty of repairing – you will have to strip away the whole roll!
- (Enhanced) urethane: Strictly speaking, this is not a type of vinyl flooring but a layer that helps strengthen the protection. Enhanced urethane is more preferred, although slightly more pricey since it can resist wear and tear well.
- No-wax: No-wax is another coating layer, but its purpose is the exact opposite of the previous option. It is used to enhance the glossy appearance of your flooring instead of durability, hence more prone to damage and needs more careful maintenance.

The Downsides Of Vinyl Floors
Sure enough, vinyl flooring is built to last, but how long exactly? The answer is even shorter than you think sometimes. Even when shielded with a protective layer, the surface is bound to damage, such as discoloration or wear and tear.
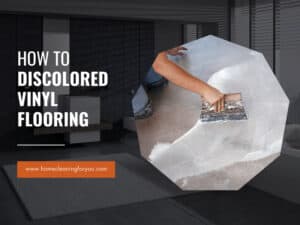
Discoloration
Prolonged exposure to rubber (from wheeled suitcases, for example), is the reason leading to discoloration on your vinyl floors. Other factors include UV rays and saltwater; still, these factors won’t affect your flooring unless it is of poor quality.
Scuff Marks And Scratches
If visible damage such as scuff marks and scratches occur, pin the blame on dirt and debris. Although tiny, such particles can scratch the finish of your flooring when walked on, resulting in more conspicuous damage over time.
To prevent such damage, it is utterly important to clean your vinyl floors frequently. But, how can you do that, and which method is the best? The following section will unveil the secrets!
A Detailed Guide To Maintaining Your Vinyl Floors
Briefly speaking, the process can be broken into two main steps: cleaning and polishing, with the former including regular and deep cleaning. Depending on personal preferences and the conditions of your flooring, you will choose the most suitable method.
Cleaning Your Vinyl Floors
Here’s a lowdown of what you need to know about keeping your vinyl floors spotless!
Regular Cleaning
According to experts, synthetic flooring like vinyl and laminate should be thoroughly cleaned once per week. However, if you have more time at hand, daily cleaning is highly encouraged – there are plenty of approaches to choose from: sweeping, mopping, and vacuuming.
- Sweeping: To sweep your vinyl floors, your best bet is to use a soft broom. Don’t opt for abrasive cleaning implements, or the dirt and dust will scratch your vinyl floorings.
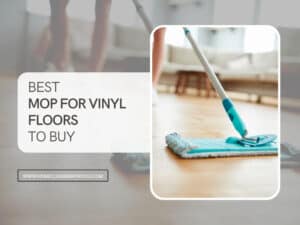
- Mopping: Mopping, whether wet or dry, is an excellent alternative to keep your floors squeaky clean. There are plenty of mops for cleaning vinyl floors on the market today to opt for – don’t hesitate to invest in one.
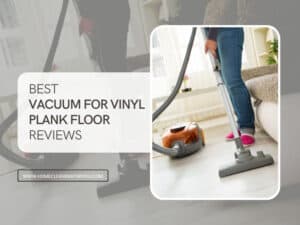
- Vacuuming: For a quicker result, you can run the vacuum over the surface and call it a day! Easy-peasy! Apart from impurities like dirt or dust, the device will suck up food crumbs, pet dander, allergens, and more.

Mop your vinyl flooring like an expert with this informative guide.
Deep Cleaning
Quick touch-ups are not enough when embedded dirt or persistent stains have invaded your vinyl flooring. However, that does not mean you will have to accept defeat. Stick to the guide below, and you will win this battle!
Tools And Supplies
The tools and supplies required for the process will vary based on the condition of your vinyl flooring, such as whether stains are visible or not. To find out which ones you will need, read over the instructions first.
- Water
- Apple cider vinegar
- Dishwashing soap
- Essential oil/mineral oil/baby oil
- Baking soda
- Egg yolk
- Black soap
- Rubbing alcohol
- WD-40/jojoba oil
- Vinyl floor cleaner
- Microfiber cloths
- Cotton balls
- Soft-bristled brush
- Soft broom/spin or spray mop/vacuum cleaner
- Protective gear
Instructions
The instructions for deep cleaning your vinyl flooring consist of five steps.
Step 1: Get Rid Of Dirt And Dust
To start with, you will eliminate dirt and dust from the surface. As instructed earlier, there are three approaches for this job: sweeping, vacuuming, or dry mopping. The last route calls for a good spin mop, but a spray mop should also do the job.
Alternatively, if you decide to use the vacuum, make sure that it is on the soft settings. Don’t forget to use the correct attachments, or you will damage the floors. Declutter the furniture if it gets in your way or hinders your progress.

Step 2: Choose/Make Your Cleaning Solution
Now, it’s time for a wet cleaning treatment! To boost your cleaning performance, skip water – it only cleans and cannot restore the shine of your vinyl floors. Instead, grab a vinyl flooring cleaner, which can produce a more rewarding result.
Note: Unwaxed vinyl floors will demand a specialized no-wax cleaner.
Or, if you prefer a DIY route, bring out the good old bottle of apple cider vinegar, which has a high acidity that can tackle most stains without stripping away the finish. As a substitute, dish soap is super effective against stubborn stains, yet you are not recommended to use it often.
To create your cleaning solution, combine a tablespoon of dish soap with 1/2 cup of vinegar and a gallon of water. Stir well to distribute.
For a more aromatic result, bring in 1 tablespoon of your favorite essential oil. My top picks are lemon, lavender, and tea tree! No essential oil? Swap it with mineral or baby oil.
Below are a few more cleaning solutions for you to consider:
- Baking soda (50 grams) and water (3 liters)
- Alcohol (3 tablespoons) and warm water (1 liter)
- Egg yolk (2 yolks) and warm water
- Soda ash (1 cup) and hot water (1 liter)
- Black soap (2 tablespoons) and water (2 liters)
Note: Do not go overboard with black soap. It is somewhat potent and can tarnish your vinyl flooring’s protective coating.

Step 3: Wet Mopping
Get your mop and cleaning gloves ready! The right way to mop is to start from a corner, then gradually work towards the door. If your whole house uses vinyl flooring, the kitchen is where you will begin the work, followed by the bedroom and the bathroom.
A friendly reminder for every homeowner: vinyl floors are water-resistant, not water-proof, so you are not recommended to soak the surface. Otherwise, the fluid will penetrate the flooring and facilitate mold growth, which is detrimental to your health. (1)
Step 4: Treating Stains
After a vigorous mopping session, your floors are finally looking good again! Aren’t they? Did you miss the stains left by your guest’s red wine glass and your children’s marker? I’m not a joykiller, but it seems like you forgot those scuff marks in the corner as well.
No, mopping again and again won’t help. When deep-set dirt, stains, and other signs of wear and tear are giving you a hard time, turn to these natural remedies for help.
- Beverage spills: No fuss when someone has accidentally spilled a little wine or soda on the floor. To lift such stains, form a paste using equal portions of baking soda and water and let it sit on the stains for a few minutes. Clean the paste with a washcloth.
- Makeup or ink stains: These stains are tough to remove, but put your worries to bed with rubbing alcohol. Moisten a cotton ball with small quantities of alcohol, then begin dabbing the stain. Replace new cotton balls until the stain fades away.
- Scuff marks and other stubborn stains: Grease, grime, or other heavy-duty stains won’t go away? If that’s the issue, it’s time to bring out the big guns: WD-40. Rub the stains thoroughly with the lubricant and rinse with water once done. Jojoba oil is also an excellent candidate.

For extra cleaning power, you can use a soft- brush to loosen the stains. Abrasive tools such as a stiff brush or steel wool are a big no-no. Also, should you have something get stuck, do not attempt to scrape it out with sharp objects. Instead, soak the area and pull it out using a soft washcloth.
Note: When using harsh chemicals like hydrogen peroxide, don’t forget to keep the working site well-ventilated as excessive exposure to its fume will irritate your eyes, skin, and throat. (2) And, remember to don your protective gear!
No more paint stains on your vinyl flooring with these household supplies.
Step 5: Rinsing
Once finished, don’t forget to wash the floors again to get rid of the residual solution. If oil or dish soap remains, the floor will not only become slippery but can also attract dirt days later, and you have just scheduled yourself another cleaning task.
Apply A New Protective Coating
Unfortunately, if your vinyl flooring does not seem to spruce up after hours of effort, the last resort is to refinish the surface. Unlike the refinishing cost of hardwood floors, which is a bit exorbitant, the process for vinyl floors is on a dime.
Tools And Supplies
Below are the following tools and supplies you will need to assemble for this job.
- Water
- Floor polish remover
- Urethane coating
- Microfiber mop
- Sponge
- Rotary scrubber
- Protective gear
Instructions
The process comprises two steps and will last for about five days, depending on the type of finish you have.
Step 1: Strip Off The Old Coating
First and foremost, you will need to check with the manufacturer to find out the best stripper for your vinyl floors. Once you have it at hand, apply it to the entire surface with a microfiber mop. Let the stripper film rest as instructed and flush it away with clean water once done.
With tougher finishes, a little elbow grease is essential. You will use a rotary scrubber fitted with the strippers and glide it across the surface until the polish degrades. Wash the sludge material away with extreme caution and finish the procedure with a meticulous rinse.
Step 2: Refinishing
After saying goodbye to the old finish, it’s time to apply a new one. As stated, urethane is a great choice because it lasts 10x longer than wax and calls for minimal upkeep. Follow the instructions above for 100% success.
To apply a new coat, use a sponge and work from one side of the floor to the other. Ensure that the strokes are lightly and evenly applied. The coating should dry up and cure within 2 days, providing that the temperature is conducive (65 degrees F).
If you wish, continue the process and apply a second coat after the first one is dry to touch (usually about an hour). Successive coats will require more hours to apply and dry. As you finish the job, let the new coatings stand for at least five days.
Note: Urethane is a toxic chemical. Overexposure to this compound will make you dizzy or nauseous, sometimes even passing out. Hence, minimize contact with it by wearing gloves and an air mask.
This visual guide will show you how to strip and refinish your vinyl floors like a pro.
Preventative Measures For Oh-So-Shiny Vinyl Floors
It’s more straightforward to maintain rather than clean your vinyl floors, and nothing comes closer to that truth. For this section, you will get to learn some valuable tips to keep your floors looking brand new.
- Avoid direct sunlight: It’s not easy to run away from the sunlight. Still, if possible, you will want to drop down the curtains or blinds when the sun is at its peak.
- Limit foot traffic: Shoes are officially banned on vinyl floors! They act as a vehicle for dirt, dust, and other impurities, which damage the finish when walked on. Get a doormat if possible.
- Wear paddings: Not you, but your furniture! If they are heavy, or when you plan to move them from here to there, you will want to cover their legs with paddings. The paddings will avert the risk of scratches or scuff marks in the long run.
- Clean your floors regularly: Your vinyl floors need cleaning therapy once a week. When accidents happen, such as spillage, don’t be reluctant. Get your mop out, or the issue will exacerbate by the following day.
- Skip the big guns: Say no to hot water, heavy-duty cleaners, and abrasive tools like wire brushes or beater bars. You will regret your decision.
Keep the instructions and these tips in mind – from now on, no need to splurge your cash on professional cleaning anymore!

FAQs
Got more questions? Read through the following section for a clearer understanding of what you have to do to make your vinyl floors shine again.
Enjoy The Glam On Your Vinyl Floors
How do you make vinyl floors shiny? Sure enough, this question will no longer be a burden in my mind. Vinyl floors are an investment and offer your home a great depth of character, and in return, it’s your job to make sure it’s always beaming.
So, did you enjoy my post? Feel free to contribute anything you like if I fail to mention them. Of course, tips and questions are highly welcome. Don’t forget to share your cleaning result in the comment section – I’m waiting!

References
- Mold health issues – Wikipedia. (2022)
- Assets.publishing.service.gov.uk (2022). Retrieved from Hydrogen_Peroxide_Toxicological_Overview_phe_v1.pd
Samantha Lee
Head Cleaning Expert
Expertise
Professional Home Cleaning, Green Cleaning Techniques, Stain Removal & Fabric Care, DIY Home Maintenance & Organization, Sustainable Cleaning Products, Home Care for Busy Lifestyles
Education
University of Denver
Samantha Lee is the Head Cleaning Expert at HomeCleaningForYou.com, specializing in eco-friendly home care. She holds a Bachelor of Science in Environmental Science from the University of Denver, focusing on sustainable cleaning solutions.
With expertise in green cleaning, stain removal, and DIY home maintenance, she helps homeowners keep their spaces fresh and chemical-free. Samantha has been featured in lifestyle publications and has partnered with brands promoting natural cleaning products.
She also shares practical tips through her blog, online courses, and workshops. Passionate about sustainability, she enjoys testing new eco-friendly cleaning methods and spending time outdoors.