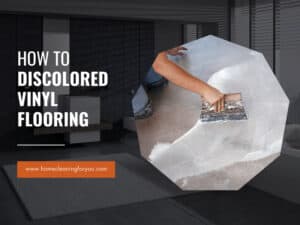
Ways to Dry Water Under Vinyl Planks Fast

In this comprehensive article, I will provide you with a guide on how to dry water under vinyl plank flooring. As long as you follow it, your precious vinyl plank flooring will not be damaged because of water. Everything you need is some time and effort.
Don’t panic when you see some water get through your vinyl plank flooring. There are ways to fix it. Let me guide you to the most effective procedure to remove water from vinyl plank flooring.
Why Should You Dry Water Under Vinyl Plank Flooring?
When installing vinyl plank flooring, you may read that it is waterproof. That’s why it is suitable for all areas of the house, including those that have much contact with water, such as bathrooms, kitchens, and basements.
However, in some cases, water can still make its way deep into the floor and cause damage to it such as bubbles, ridges, discoloration, and even mold and mildew if it is left for too long.
Common liquid spills such as water, milk, wine, and oil can hardly damage vinyl plank flooring. But the problem arises when it comes to the subfloor underneath. For example, if your toilet leaks water for a long amount of time and you don’t know it, the floor may be damaged.
You should note that the water seeped inside the floor cannot dry by itself. That’s why you should take action right after you detect it. Continue reading to see when your vinyl plank flooring has a moisture problem.

Signs Of Excessively Moisturized Vinyl Plank Flooring
When you see these signs on your vinyl plank flooring, it is likely to be affected by the water underneath. You have to take action to remove it from the floor.
Damages On The Surface
An obvious sign of excessive moisture is the damage that it causes on the surface of the flooring. They are fairly easy to detect. This kind of damage usually comes in the form of bubbles, buckling, ridges, warping, discoloration, bleeding, nicks, chips, and bumps.
If you do not detect these signs, don’t leave yet. Put your finger on the planks and move around to check the floor more carefully. In addition, if you notice that the edges of the planks lift up, it can be caused by water.
Another symptom is the deterioration of the adhesive. Moisture will weaken it and cause the planks to move.

Mold And Mildew
Mold is a very disturbing thing on your vinyl plank flooring. Its ideal living environment is a moist place. If water gets into the subfloor but you don’t know, a few months later mold will start to develop. It has a very distinctive musty and earthy odor.
Some other signs of mold and mildew include cracking, peeling, and warping. Whenever you pour bleach on an area and it starts to lighten, it is possible that mold is present there.
In addition, when the dark spot becomes bigger and dirt and grime remains the same, mold is likely to present.
For wood subfloors, moisture can attack the floor from the crawl space. As a result, mold will appear on the floor joists. Black mold and dripping are the most obvious signs. It can also cause lifting and buckling on the floor surface.
You can use a mold test kit to check whether your vinyl plank flooring has mold or not. There is some mold that is harmful to your health (1). So you should remove it immediately using bleach and water (2). Turn on the fan or an air purifier to dry the area completely.
If you cannot clean it yourself, call a professional for advanced help.
Let’s see how mold attacks the subfloor of your vinyl plank flooring.
In Case None Of These Signs Exist, You Also Have To Check The Floor
Even when you find no signs of moisture on your vinyl planks flooring, you have to check the floor to confirm, especially when you hear the dripping sound or realize that the grass seems to be greener and your water bill is more costly than usual.
First, uninstall some vinyl planks on the flooring. Then, use a moisture test unit to check whether there is any moisture on the subfloor.
Alternatively, you can put a rubber mat on the subfloor and leave it there for 24 hours. Thereafter, if the backside of the mat is wet, you should look for a way to handle moisture on the floor.
Also, notice your roof or attic and conduct a dye test on your toilet. Maybe you will find some moisture symptoms.

How To Dry Water Under Vinyl Plank Flooring?
Don’t worry if your vinyl plank flooring has all of the terrible symptoms below. It will go back to the perfect state after you dry the water under it. There are two options for you. The first one is asking for the help of a professional and the second one is to do it yourself.
If you choose option 2, the content below is a comprehensive guide on how to do it
Vinyl plank flooring can be installed in two ways. Adhesive can be used to stick the vinyl planks and the subfloor. Or, the planks can float directly on the subfloor. The method of installation decides how the water can be dried.
Choose method 1 if your vinyl planks are installed directly on the subfloor and method 2 in case they are glued by adhesive.
Method 1: Dry Out The Subfloor From The Crawl Space
This method applies to vinyl plank flooring that is installed on a wood subfloor. Once you notice some bubbles or bumps on the flooring, find the crawl space beneath the floor. You may be able to find some problems on the joists such as dripping and mold.
Put a fan there and let it sit for a few days until the subfloor is completely dry. If there are multiple leaks and stripping, you may need some more fans.
If your house has 2 floors, look at the ceiling and humid air to see if there is any pipe that is dripping or leaking. After you know where the problem lies, try to fix the dripping areas and use fans to dry them out.

Method 2: Dry Out The Subfloor By Pull Up The Vinyl Planks
For a vinyl plank flooring that is installed by adhesive, you can dry the water under it by uninstalling the affected planks and drying it out.
What You Need
- Shop-vac (or a mop, a squeegee, or a water extractor)
- Floor scraper
- Heat gun
- Gloves
- Goggles
- Protective clothes and shoes
- Vinyl-safe cleaner
- Moisture meter
- Chemical stripper
- Borax
- Water
- HEPA vacuum
- Spray bottle
- Respirator mask
- Dehumidifier (medium-sized)
- Broom (or brush)
- Plywood (¼ inch thick)
- Fry bar ( or screwdriver)
- Garbage bag
- Plastic
- Fan
- Heater

Step-by-step Instruction
Step 1: Identify the cause of moisture
I have mentioned above all of the signs of moisturized vinyl plank flooring as well as the possible source of water. Finding that source once you detect damage symptoms is the very first thing to do.
Wear protective clothes, shoes, goggles, gloves, and a respirator mask to protect yourself against mold.
Step 2: Prepare The Room
Next, you have to rearrange any furniture in the room. Put it away from the affected areas. If it is moldy, place it under the sun to kill the mold. Later on, apply borax on it to make it clean again.
With extremely moldy furniture that cannot be used anymore, put it into a garbage bag, then seal it and throw it away.
Step 3: Uninstall The Planks
Use the floor scraper to lift up the vinyl planks. For vinyl plank flooring that is installed on a concrete floor, you should use a heat gun or chemical stripper to help with taking the planks out. It will heat the adhesive to make it less sticky.
You can also use a pry bar or screwdriver to assist.
You should note that some old vinyl plank flooring has asbestos, a chemical substance that can cause some serious illness such as lung cancer if you breathe it in. To ensure your safety, I recommend that you ask a professional to do this step.
Note: If you cannot pull off the planks by scraping, you use plastic to cover the planks and place a plywood layer on them. Choose the one that is ¼ inch thick. After that, apply a layer of adhesive and lay a new vinyl plank.
Step 4: Remove The Water
You can clean off the water under the vinyl plank using a shop vac, a squeegee, or a water extractor. Alternatively, if there is too much water, you can use a mop to absorb the water. After that, you can use a vinyl floor cleaner to clean the floor.
Step 5: Treat Mold
If mold has built up on your vinyl plank flooring, you have to remove it with a mixture of 1 cup of borax and 1 gallon of water. You can pour it into a spray bottle and spray the moldy areas or apply it on the areas using a broom or brush. Make sure you spread it evenly across the areas.
Let it sit there for 10-15 minutes. Then use a brush or broom to scrub the areas. You will need to apply borax some more times if the mold is not completely wiped out.
If you have a HEPA vacuum, use it to clean the remaining residue. Alternatively, you can apply the borax solution all over the floor using a rag. Do not make it too wet as fungus can develop on the subfloor.
After you’re done, spray the borax solution on the flooring to prevent mold from being attacked by mold once again. Wait until it shrivels.
Step 6: Dry The Area
Turn on all of the fans in the room to speed up the drying process. If you have a medium-sized dehumidifier or heater, use them as well. Make sure the subfloor withers before moving to the next step. It will need more than 2 day for drying. To check this, you can use a moisture meter.
Another way to test is to use tape. You should tape a small plastic layer on the subfloor. Wait for 1 day before removing it. Then, look closely at it. If it is moist or wet, then the subfloor is still wet and needs to be dried more.
Step 7: Reinstall The Planks
When the subfloor is completely dry, you can reinstall the vinyl planks. If the old planks are not heavily damaged then you lay them back on the subfloor. In other circumstances, such as when it is moldy, lifted up, warped, or has a lot of bubbles, it is best to replace them with new planks.
Note: If your vinyl planks are installed by gluing, do not reinstall it by yourself. Instead, seek a professional.
Step 8: Fix The Source Of Moisture
You have found where the water comes from. The final step is to repair to prevent future damage on your vinyl plank floor. You should seal any leak that you found in the pipes along the basement walls or crawlspace.
Drying water under vinyl plank floor is never a challenging task.
Tips To Keep Your Vinyl Plank Flooring Away From Water
Bubbles, ridges, and other damage that is caused by water is very frustrating. They degrade the beauty and quality of your vinyl plank flooring. Therefore, you should make some effort to protect it from any form of liquid following these useful tips and tricks.

- Clean the spill as soon as it appears on the floor surface.
- Invest in a conditioned crawl space. It can balance out the moisture and prevent the growth of mold. It can also improve the air quality.
- Consult the professional if you see that the damage is too serious.
- When installing the vinyl planks, you should carefully choose a subfloor that can endure water. And strictly follow the recommended procedure by the manufacturer.
- Pay attention to the water-cement ratio when installing the subfloor. Make sure you choose a low ratio. It will help to prevent moisture.
- Install a flooring underlayment to the vinyl plank flooring.
- Always watch out for water leaks in the house. Inspect your washing machine and dishwasher.
- If you have a moisture detection kit, you can use it to measure the degree of moisture in the subfloor. When it is less than 2.5% CM, you can safely install the vinyl planks.
- Also, test the pH levels of your subfloor using a pH test kit. Pour some distilled water on the subfloor and leave it for 1 minute. Put the pH strip into the water. If the pH level is below 9, you can continue with the installation process.
- Before you install the vinyl planks, make sure the subfloor is entirely dry. You can test this by placing a mat on the subfloor for 1-2 days.
- When the vinyl plank flooring is spongy, you should uninstall it and get a new one.
- Wait until the slab is completely dry and cured before you lay vinyl planks. To make it dry faster, use a dehumidifier.
- If you install vinyl plank flooring in a moist area, it is important to make sure that water displacement is smooth and flawless. Some more draining lines and water extraction pumps may be recommended.
- Invest in a vapor retarder.
- Choose vinyl planks that have mildewcides. They can resist mold.
- For vinyl planks that are installed in the toilet, you should seal the toilet wax ring with a silicone sealant. This will help to prevent water leakage.
- It is also necessary to invest in gutters on the roof.
- When choosing the materials to install vinyl plank flooring, pay attention to permeability. Make sure you pick those that have good permeability to balance out the moisture in the flooring.
Moisture under vinyl plank flooring can be an issue of installation.
FAQs
In case you have more concerns about how to dry water under vinyl plank flooring, you must not miss this section. I have found the most asked questions about it and answered them below. Check them out.
Water Can No Longer Harm Your Vinyl Plank Flooring
After reading this article, you should inspect your vinyl plank flooring area by area to check for the signs of moisture. It’s lucky if you do not find any damage. But suppose that you see some serious signs, they can be fixed by the method I have provided.
Don’t worry about the chance of having moisture under vinyl plank flooring when you spill liquid on the floor. Just pay attention to the water sources and make sure they are not dripping and leaking.
If you have further questions, do not hesitate to ask me by leaving some comments. I will try my best to help you with all of my knowledge and experience.

References
- US EPA.. Mold and Health | US EPA.
- Healthline.. Does Bleach Kill Mold? Plus Health Concerns and Nontoxic Alternatives.

Samantha Lee
Head Cleaning Expert
Expertise
Professional Home Cleaning, Green Cleaning Techniques, Stain Removal & Fabric Care, DIY Home Maintenance & Organization, Sustainable Cleaning Products, Home Care for Busy Lifestyles
Education
University of Denver
Samantha Lee is the Head Cleaning Expert at HomeCleaningForYou.com, specializing in eco-friendly home care. She holds a Bachelor of Science in Environmental Science from the University of Denver, focusing on sustainable cleaning solutions.
With expertise in green cleaning, stain removal, and DIY home maintenance, she helps homeowners keep their spaces fresh and chemical-free. Samantha has been featured in lifestyle publications and has partnered with brands promoting natural cleaning products.
She also shares practical tips through her blog, online courses, and workshops. Passionate about sustainability, she enjoys testing new eco-friendly cleaning methods and spending time outdoors.