How To Apply Polyurethane To Hardwood Floors: A Complete Guide
To ensure that your hardwood flooring lasts for as long as you want, it is important to apply a finish after installation by knowing how to apply polyurethane to hardwood floors. Polyurethane provides a layer of protection to hardwood flooring.
Hardwood flooring is probably the best choice when picking a type of flooring. Apart from giving the home an elegant look, hardwood floors match almost every type of interior décor, are easy to maintain, and even increases the value of the property.
This post is a guide to applying polyurethane to newly installed hardwood floors. It is also relevant for those looking to refinish their hardwood floors or to cover up wears and tears in old floors when just use hardwood polishing is not enough.

Water-Based Vs. Oil-Based Polyurethane Comparison Chart
There are essentially two types of Polyurethanes; water-based and oil-based.
Deciding on a type to use will depend largely on your situation, preference and the area you want to apply the finish. Below is a comparison of both types of polyurethane. Using these points, you can decide which works best for you.
| Variable | Water-based Polyurethane | Oil-based Polyurethane |
| Dry time | Shorter drying time (2-3 days) | Longer drying time (4-5 days) |
| Color and Shine | Less shine | More shine |
| Required coats | 3 coats for high quality product
4-5 coats for lower quality product | 3 coats required |
| Technical Know how | Often requires professional experience as it dries faster giving less time to correct mistakes | It takes longer time to dry and allows correction from inexperienced users |
| Durability | Lower quality products can last up to 4-6 years, while high quality products can last up to 10 years | Lasts up to 10 years and beyond |
| Cost | More expensive | Less expensive |
| Volatile Organic Compound | Contains more volatile organic compound | Has less volatile organic compound |
Both water-based and oil-based polyurethane have their unique properties and advantages. The comparison done will guide your choice of choosing one depending on the intended use and purpose.
Furthermore, water-based polyurethane contains large amount of volatile organic compound and as a result of this, it is limited for use in some type of buildings for safety reasons.
Here is a short video highlighting the differences between water-based polyurethane and oil-based polyurethane.
Tools Needed To Apply Polyurethane On Hardwood Floors
In applying polyurethane on hardwood, some tools are necessary in carrying out this task. The tools used for application and also ensuring safety are:
- Polyurethane sealer
- Bristle brush (natural bristles for oil-based; synthetic bristles for water-based)
- Tack cloth
- Paint tray
- Abrasive brush
- Masking tape, Steel wool and Sand paper
- Stirrer
- Safety equipment (Goggles, Gloves, Respirator)
- Vacuum
- Broom and Mop
Ingredients Needed
While applying polyurethane to hardwood floors, here are the items you will need:
- White vinegar
- Mineral spirits
- Soap
- Water
Safety Tips While Working With Polyurethane
Polyurethane contains some chemicals but when used safely poses no danger. Thus, before applying polyurethane it is important to note some of these safety tips:
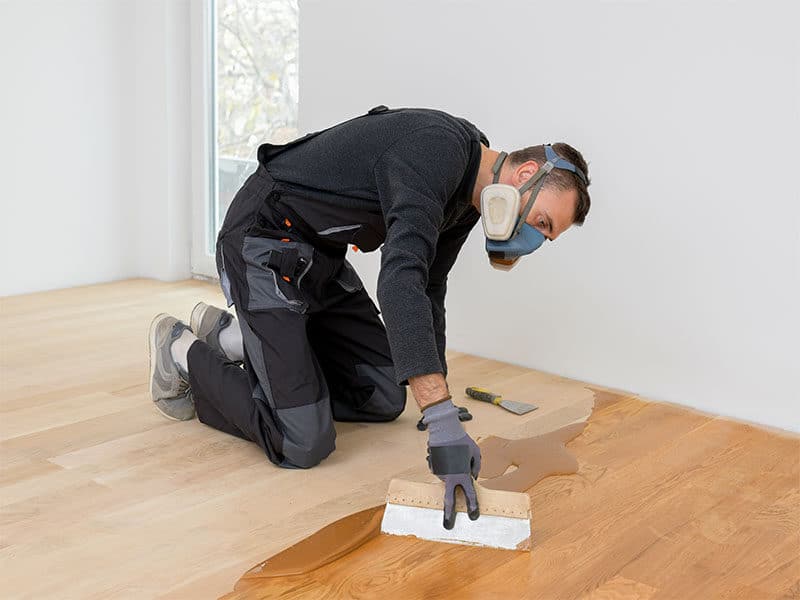
- Use a Respirator/Facemask: When working with heavy fumes such as those found in the oil-based polyurethane, it is important to use a respirator to reduce the number of fumes inhaled.
- Ensure Ventilation: While working with polyurethane it is important to ensure that the work area is well ventilated to facilitate easier breathing. It is advised to keep all windows and doors open in addition to using respirators or facemask.
- Use Gloves and Safety Goggles: Polyurethane should always be applied with a brush but gloves are still very necessary to avoid contact with skin. Similarly, safety goggles will prevent drops or splashes of polyurethane from entering the eyes.
- No Smoking: The contents of polyurethane are highly flammable; thus, it is important to ensure that nobody is smoking around the work area and there are no open fires. A fire extinguisher should be kept around the work area at all times.
Extra care should be taken for water-based polyurethane as it contains more volatile organic compound. - Proper Clean-Up: After work, ensure that all cans of polyurethane are properly disposed of to reduce health and fire hazards. There is often designated disposal option for these type of cans, safety should be considered while disposing.
How To Apply Polyurethane To Hardwood Floors
Now that you have the required material and have ensured safety, you can protect your hardwood floors by adding polyurethane in these simple steps.
Step 1: Prepare The Floor
Unless the floor is new and pre-sanded, it is important to sand it with three different types of sandpapers; 36-grit sandpaper, 60-grit paper and 100-grit sandpaper, in that order. This will remove all imperfections and ensure a smooth surface is ready.
Next, it is important to ensure that the floor is properly clean. This can be done using a vacuum cleaner for hardwood floors or broom and a mop with water and white vinegar (10:1 ratio). Pay attention to the room corners while cleaning.
After doing that, the next thing to do is to wipe down the work area with the tack cloth; this will ensure that all residual dust or debris is removed before working on the floor.
Lastly, while applying polyurethane it is common to accidentally brush it on the baseboards, thus, it is important to apply masking tape to protect the baseboards.
Step 2: Stir The Polyurethane
Due to packaging, the constituents of polyurethane might be uneven in composition giving off a rough texture when used.
One of the worst things to have after applying polyurethane to hardwood floors is the appearance of bubbles. To avoid this, it is important to stir the polyurethane properly before use. Avoid shaking the can as this will create more bubbles in the can.
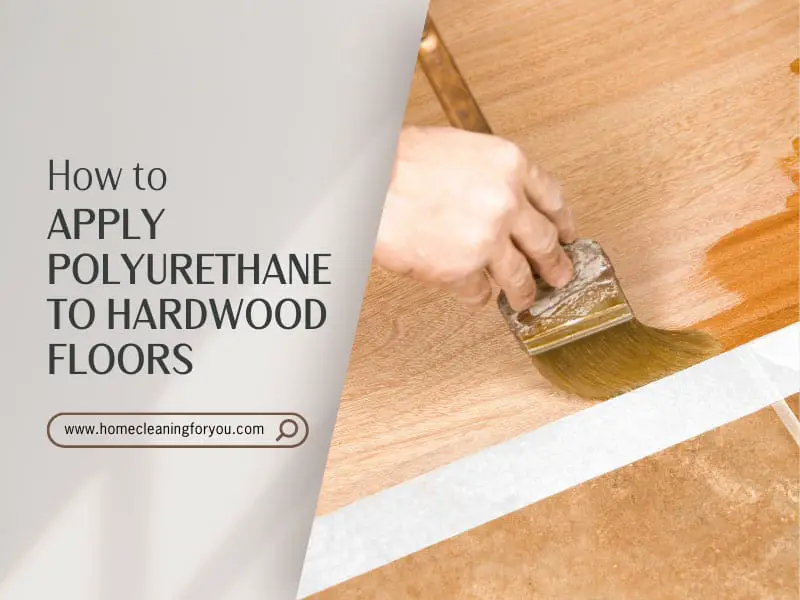
Step 3: Apply With The Brush
After stirring, pour the polyurethane into a paint tray. Use the bristle brush, to apply a thin coat of polyurethane to the hardwood floor in long even strokes. To avoid coating an area more than the rest do not go over the same spot multiple times.
While coating, it is best to start at the farthest corner of the room rather than the entrance to avoid stepping on the surfaces on which you have applied the polyurethane when leaving the room.
Step 4: Allow The Coat To Dry
After applying the first coat, it is important to wait for it to dry completely. Most water-based polyurethane will take about 3 hours to dry but the oil-based option will take longer than that.
Step 5: Sand Again
Using 220-grit sandpaper, sand uneven coats, bubbles and other imperfections, make sure you sand along the grain rather than against it.
Step 6: Wipe Down With Tack Cloth
Using another tack cloth with soapy water for water-based polyurethane or the mineral spirits for the oil-based polyurethane, wipe down the hardwood floors thoroughly to remove all dust from sanding.
Step 7: Thin The Polyurethane
Add water to the water-based polyurethane or mineral spirits to oil-based polyurethane to thin for a second coating. It should be thinned to the ratio of 10:1 (10 parts polyurethane to one-part water/mineral spirits. Stir properly and pour into the paint tray.
Step 8: Apply The Thinned Polyurethane
Using the same method as before, apply the thinned polyurethane to the hardwood floor.
Step 9: Allow To Dry Again
Once again, you will have to wait for the new coat to dry before you can continue to work on it
Step 10: Brush Over With The Abrasive Brush
Using the abrasive brush, even out imperfections and ensure that the entire area coated is levelled.
Step 11: Wipe Down
Wipe down the floor to remove dust and debris that may have gathered from brushing, using the same method as before.
Step 12: Apply Final Coat
After this, recoat the hardwood floor again and wait for up to 24 hours for water-based polyurethane and 72 hours for oil-based polyurethane before you begin walking on the finished floor.
Here is a short video explaining how to apply polyurethane to hardwood floors.
Maintaining Your Finished Floors
After moving into your new (new floors) home, you will need to maintain it for the work done to last long. While the polyurethane will take the brunt of the stress, here are some tips to ensure you will not need a refinishing anytime soon:
Clean Spills Immediately
To avoid staining of the floors, make sure to wipe every spill immediately before it can sip into the wood. Use dry or slightly damp cloths to wipe out any spill on the hardwood floors. Using wet or steamed mops will damage the wood over time.
Sweep Daily
Using the appropriate brooms for hardwoods, make sure you sweep daily to remove dirt and dust. This will prevent staining damage to the hardwood.
Vacuum The Floors Every Week
Using appropriate vacuums to clean the floors every week will remove dirt found in the crevices of the floor that the brooms may not pick, or you can also buy a Roomba for your hardwood floor.
Use Wood Floor Cleaner Every Month
There are different types of hardwood floor cleaners, find the one that suits you and ensure you use in every month
Use Furniture Pads
Furniture pads prevent the wood floors from getting scratches on them which is one of the problems faced by hardwood floor owners. Furniture pads should be added to the legs of chairs, tables, sofas, and so on.
Refinish Every 5 Years
Although your hardwood may not need a refinish, it is advisable to still refinish it every few years to protect it from excessive damage.
Extra Tips
- For those who want to refinish their hardwood floors, it is best to use the same material used during the first finish or remove the first finish entirely before applying a new one.
- You can coat your hardwood floors as much as you like using water-based polyurethane. With the oil-based option, however, it is best to do it just three times to keep it neat.
- It is advisable to vacate the house for as long as needed when planning to use oil-based polyurethane on your hardwood floors to avoid inhalation of the fumes by members of the house.
- After using the oil-based polyurethane, wait for a few days before moving in furniture and also ensure proper ventilation for the first few weeks.
- Keep the temperature of your home between 60 to 80 degrees Fahrenheit to maintain your hardwood floors.
Extra Caution
- Polyurethane needs to be used with caution, asides the basic precaution of using safety equipment like gloves, googles and respirators, if you have respiratory problems it is advisable not to carry out the application yourself.
- Family members with respiratory problems should also not be allowed to be at the site of applying polyurethane. It can also react and cause skin irritation, proper and protective clothing should be used in addition to gloves to prevent contact.
- Due to the flammability of polyurethane, it should be kept away from open fire and anything that can ignite or start a fire.
What To Expect?
Although the steps described in this post seem easy, you may find some processes a bit difficult to do alone. It is thus advisable to ask for help either from a professional, an experienced DIYer or adult family members as taking on the job on your own will make it slow and tiring.
It is absolutely fine to seek professional help if you cannot seem to get an even floor coating.
Also, quality of the polyurethane matters, there are often low and high-quality polyurethane. Choosing one usually depends on your type of hardwood flooring, it is important to get one that suits your floor to avoid damage.
What is your experience with adding Polyurethane to hardwood floors? Let us know below by dropping a comment, also remember to share this post with those that need assistance in adding polyurethane to hardwood floors.

Kevin Jones
Home Cleaning Specialist
Expertise: In-depth Knowledge of Cleaning Agents and Their Uses, Advanced Home Sanitization, Techniques Expertise in Cleaning and Maintaining, Various Floor Types, Innovations in Home Cleaning Tools
School: American College of Home Economics
Kevin Jones is a seasoned home cleaning specialist with over a decade of experience in the industry. A stickler for cleanliness and organization, Kevin brings a systematic and innovative approach to home maintenance. His expertise ranges from traditional methods to modern cleaning technology, ensuring homes are not just clean but healthy environments too.